

Manage a session
Create a session
Section titled “Create a session”- Open the relevant event.
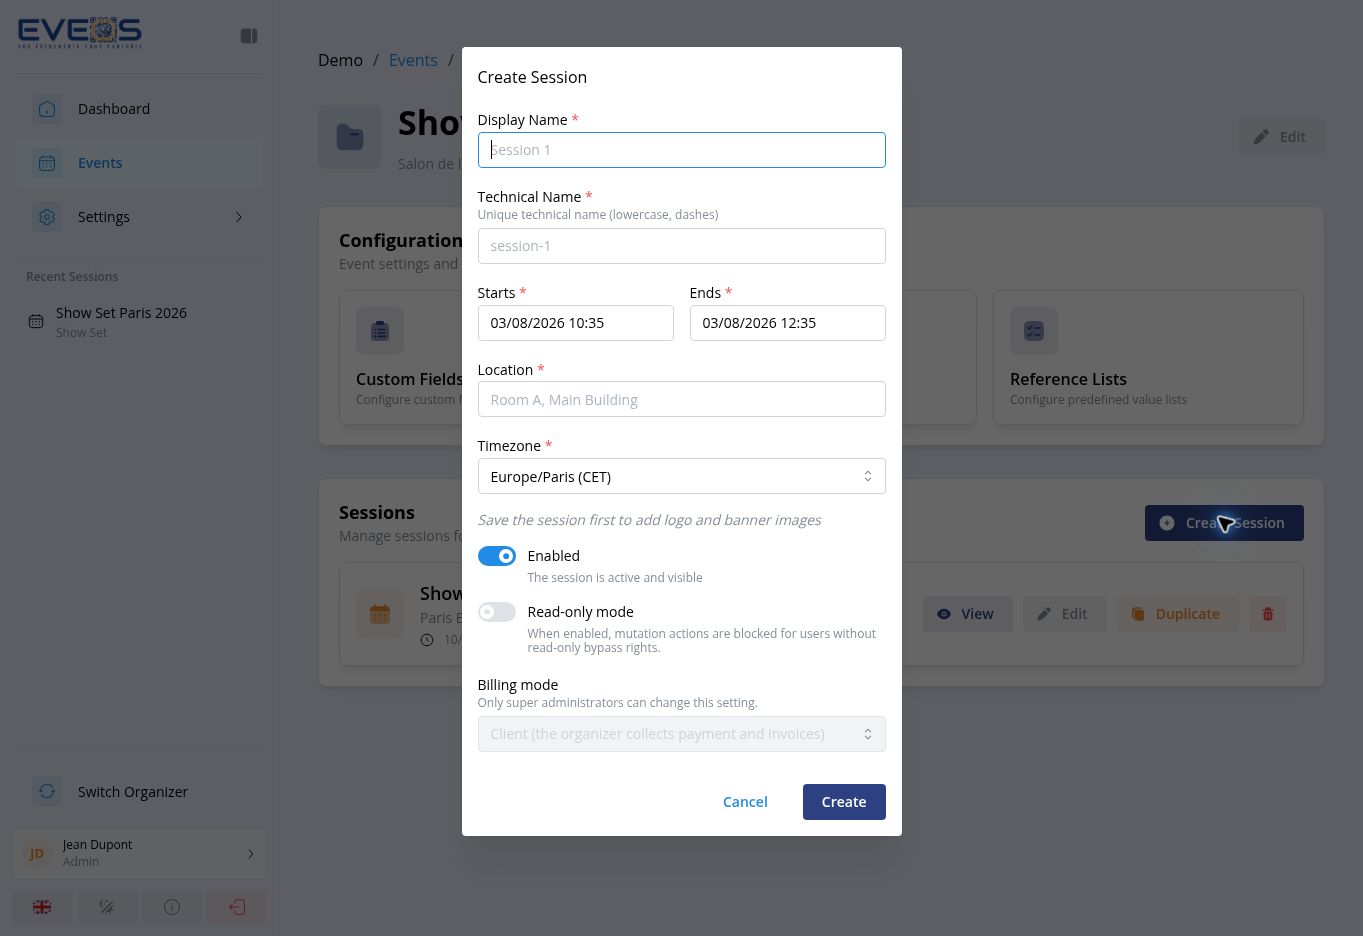
- Under “Sessions”, select “Create Session”.
- Complete the required fields:
- “Display Name”;
- “Technical Name”;
- “Starts” and “Ends”;
- “Location”;
- “Timezone”.
- Review “Enabled”, “Read-only mode”, and “Billing mode” displayed in the form.
- Select “Create”.
The technical name is presented as a unique identifier using lowercase letters and dashes. Logo and banner images can be added after the session is first saved.
Open a session
Section titled “Open a session”- Open the event page.
- Find the session under “Sessions”.
- Select “View”.
Eveos opens “Overview”. The session modules are then available in the sidebar.
Edit a session
Section titled “Edit a session”Select “Edit” from the event page or session overview.
Duplicate a session
Section titled “Duplicate a session”Duplication copies an existing session — configuration, content, and optionally participants — into the same project or a brand-new project. It opens in a side panel that stays available while you navigate.
Select “Duplicate” from the session row on the event page, then follow the four steps.
Step 1: Target
Section titled “Step 1: Target”- “Same project”: duplicate the session inside the current project.
- “New project”: copy the event into a new project. Provide the “Project name” (required), the “Default language”, a “Description”, and optional logo and banner URLs.
- Dependency handling: “Strict” (blocks if a dependency is missing) or “Automatic” (automatically includes required items).
Step 2: Content
Section titled “Step 2: Content”Under “Items to duplicate”, toggle each block: “Custom fields”, “Forms”, “Badges”, “Registration flows”, “Email templates”, “Validation gate”, “Reference lists”, “Modules”, “Exhibitors”, “Exhibitor portals”, and “Check-in structure”.
Under the target session details, provide the “Name” and “Display Name” (required), then adjust “Starts”, “Ends”, “Location”, “Timezone”, logo, banner, and whether the session is enabled.
Step 3: Participants
Section titled “Step 3: Participants”- “None”, “All”, or “Query” (advanced query selection).
- Options: “Import as prospects” and “Keep BarcodeExtra”.
Step 4: Confirmation
Section titled “Step 4: Confirmation”The summary lists any blockers to resolve (in strict mode, a button offers to switch to automatic mode). Then launch the duplication: it runs in the background — you can minimize the panel and keep working — and once finished you can open the duplicated session directly.
If the duplication fails, partial writes are rolled back automatically and you can retry after fixing the issue.