

Configure registration validation
The “Waiting zone” is used for registrations that must be reviewed before they are approved or rejected.
Create a queue
Section titled “Create a queue”- Under “Registration & Sales”, open “Validation”.
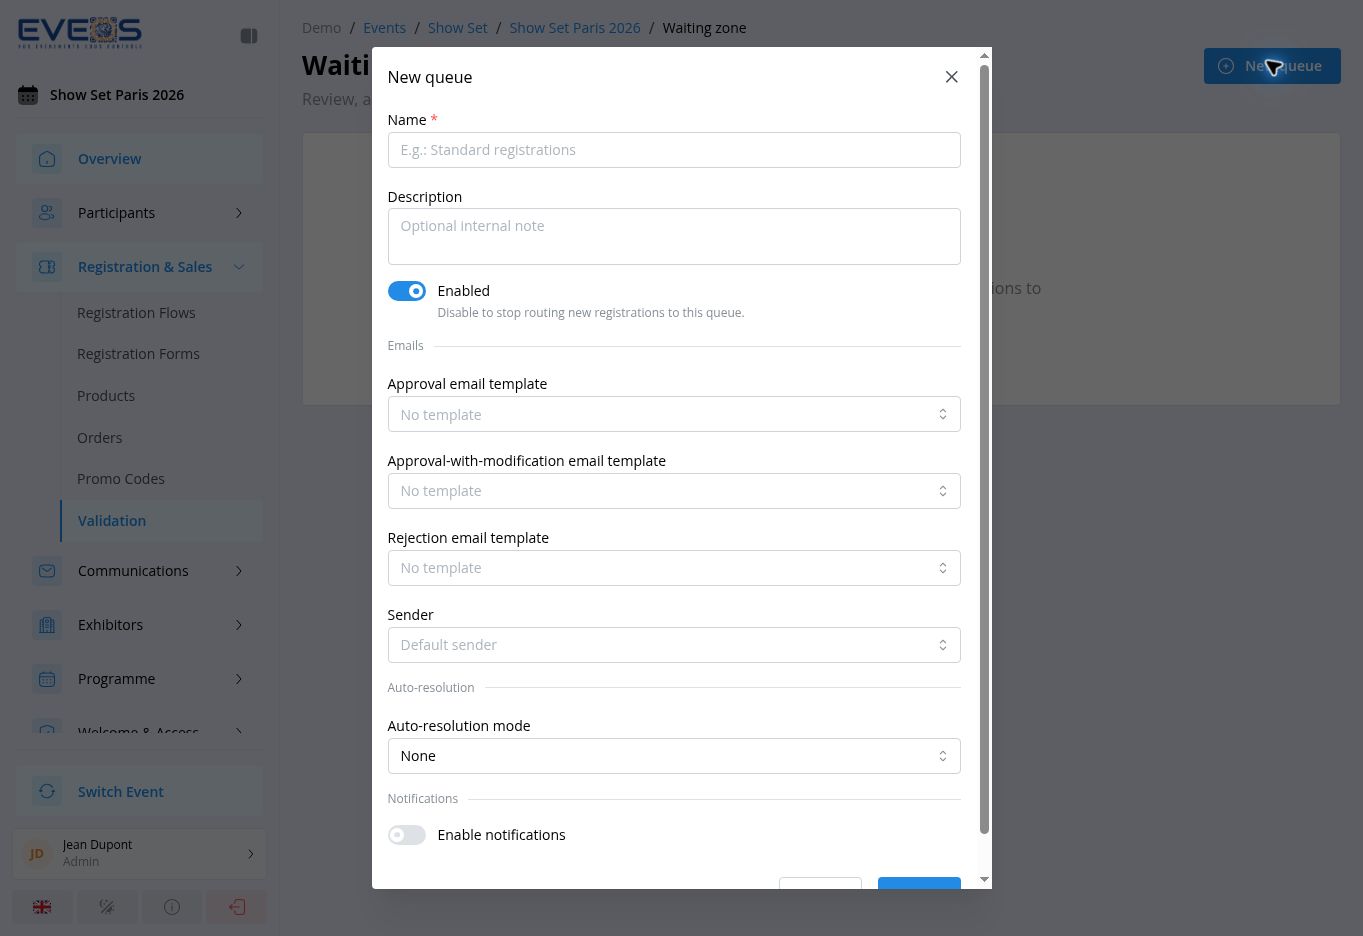
- Select “New queue”.
- Enter the “Name” and, when needed, an internal “Description”.
- Keep “Enabled” selected to route new registrations to this queue.
- Select the approval, approval-with-modification, and rejection email templates, along with the “Sender” (configured at the organizer level, see Configure payments and communications).
- Choose the “Auto-resolution mode”: “None”, “Auto-approve”, or “Auto-reject”, with a delay in minutes for the automatic modes.
- Enable notifications when needed: “Immediate” or “Digest” mode (with its frequency), recipients, and notifications for each new entry or on automatic resolution.
- Select “Create”.
Process a queue
Section titled “Process a queue”Open a queue to review its registrations. Two tabs separate “Pending” and “Rejected” entries; each row shows the participant, their company, category, and status.
For each registration, you can:
- Approve the registration;
- Approve with modification, choosing a new category;
- Reject, with an optional reason;
- Reintegrate a rejected registration (with an option to send the approval email).
Multi-selection lets you approve or reject several registrations — or all of them — in a single action.