
Configure a registration flow
A registration flow brings together the steps and rules applied to a public registration URL.
Create the flow
Section titled “Create the flow”- Open a session, then “Registration & Sales” > “Registration Flows”.
- Select “Create Flow”.
- Enter the “Flow name”.
- Enter the “Custom URL” or select “Generate unique URL”.
- Select “Create Flow”.
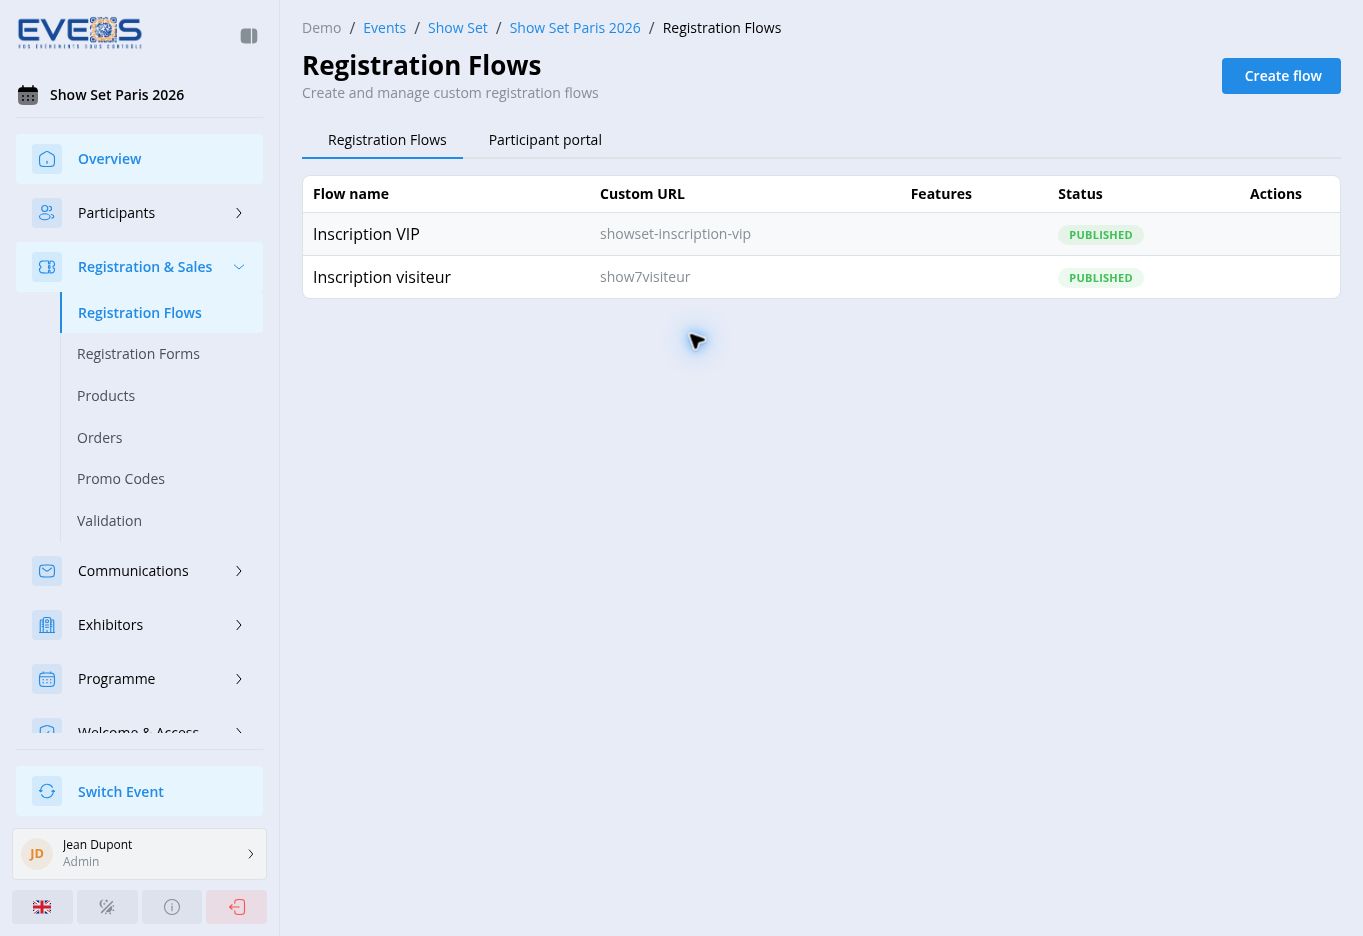
The list shows each flow’s name, custom URL, enabled features, and status: “Draft”, “Published”, or “Closed”. The action menu lets you “Edit flow”, “Publish” a draft, “Unpublish” or “Close” a published flow, “Copy link” to the public URL (once published), “Duplicate”, or “Delete”.
Configure the steps
Section titled “Configure the steps”Open the flow from the list. The “Steps” panel contains “Pre-registration”, “Registration”, “Payment”, and “Confirmation”.
Pre-registration
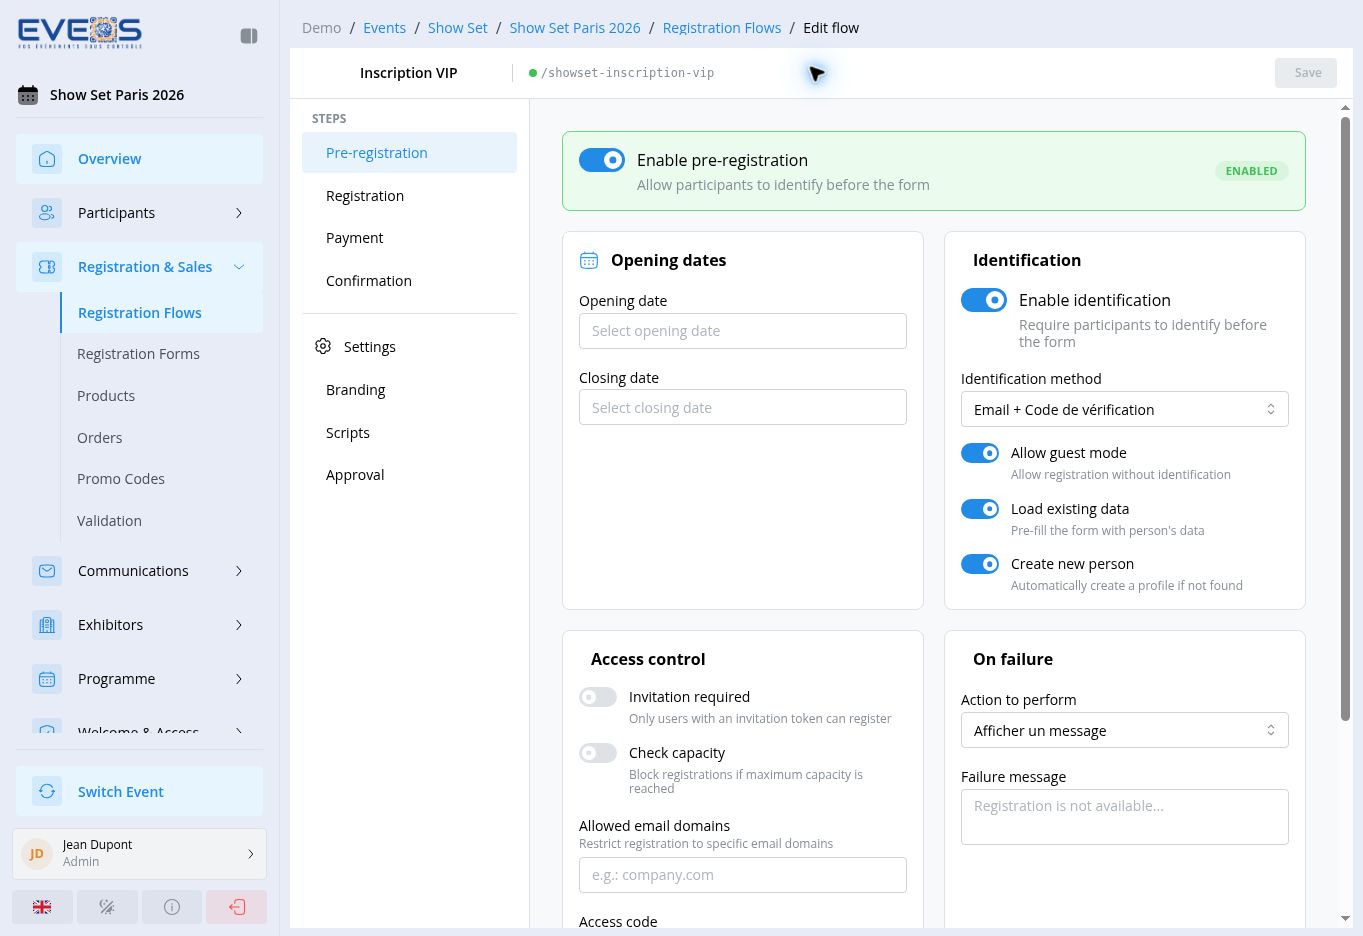
Section titled “Pre-registration”Enable this step when participants must identify themselves before opening the form. You can set opening and closing dates, then configure:
- identification and its method: email only, email + verification code, or email + password;
- guest mode;
- loading existing data;
- creating a new person when no profile is found;
- invitation requirements, capacity checks, allowed email domains, and an access code;
- the action used when identification fails: show a message, redirect to a URL, or cancel the registration;
- product selection before the form: display mode (cards, list, grid, or table), minimum and maximum ticket count, offered products, showing prices, descriptions, images, and availability, and entering a promo code at this step.
Registration
Section titled “Registration”- Choose the “Default Form Template”.
- Enable the progress bar, then choose its style: steps, percentage, dots, or hidden.
- Enable the participant count or allow optional fields to be skipped when appropriate for the flow.
- Under “Product-Form Mapping”, select a product-specific form when the default form is not suitable.
Products without a mapping use the default form selected in this step.
Payment
Section titled “Payment”Enable “Payment” only when the flow must collect a payment. The screen then lets you choose the available provider and configure the cart summary, details, taxes, promo codes, and automatic skipping when the total is free.
Confirmation
Section titled “Confirmation”The confirmation page can have a title, subtitle, and several content sections. “Add Email” and “Add Webhook” add actions at the end of the flow. A redirection can also be enabled.
Configure the overall behavior
Section titled “Configure the overall behavior”Configure back navigation, save and resume, registration session expiry, the default language, and available languages. This section also controls whether participants can return to product selection and the warning message shown for that action.
Select the logo, favicon, and banner. Configure the full-width banner, its link, the primary and background colors, and custom CSS when needed.
Add a global script or a confirmation-only script.
Enable manual approval when free registrations must be reviewed before approval.
Complete the configuration
Section titled “Complete the configuration”- Review all four steps and the configuration sections.
- Check the default form and product mappings.
- Check the flow languages and branding.
- Review confirmation content and any associated actions.
- Select “Save”.
While the flow is in “Draft”, it is not publicly accessible. Use “Publish” to make it available, then “Copy link” to share the public URL. The editor toolbar also provides a preview and an embed code.
Use the flow in the participant portal
Section titled “Use the flow in the participant portal”Return to the list and open “Participant Portal”. Select the “Default Flow” and, when needed, a flow for an individual category.