
Manage exhibitors
In the session, open “Exhibitors” and select “Exhibitors List”. The page displays each exhibitor’s company, category, booth, website visibility, profile, badges, vouchers, and tags.
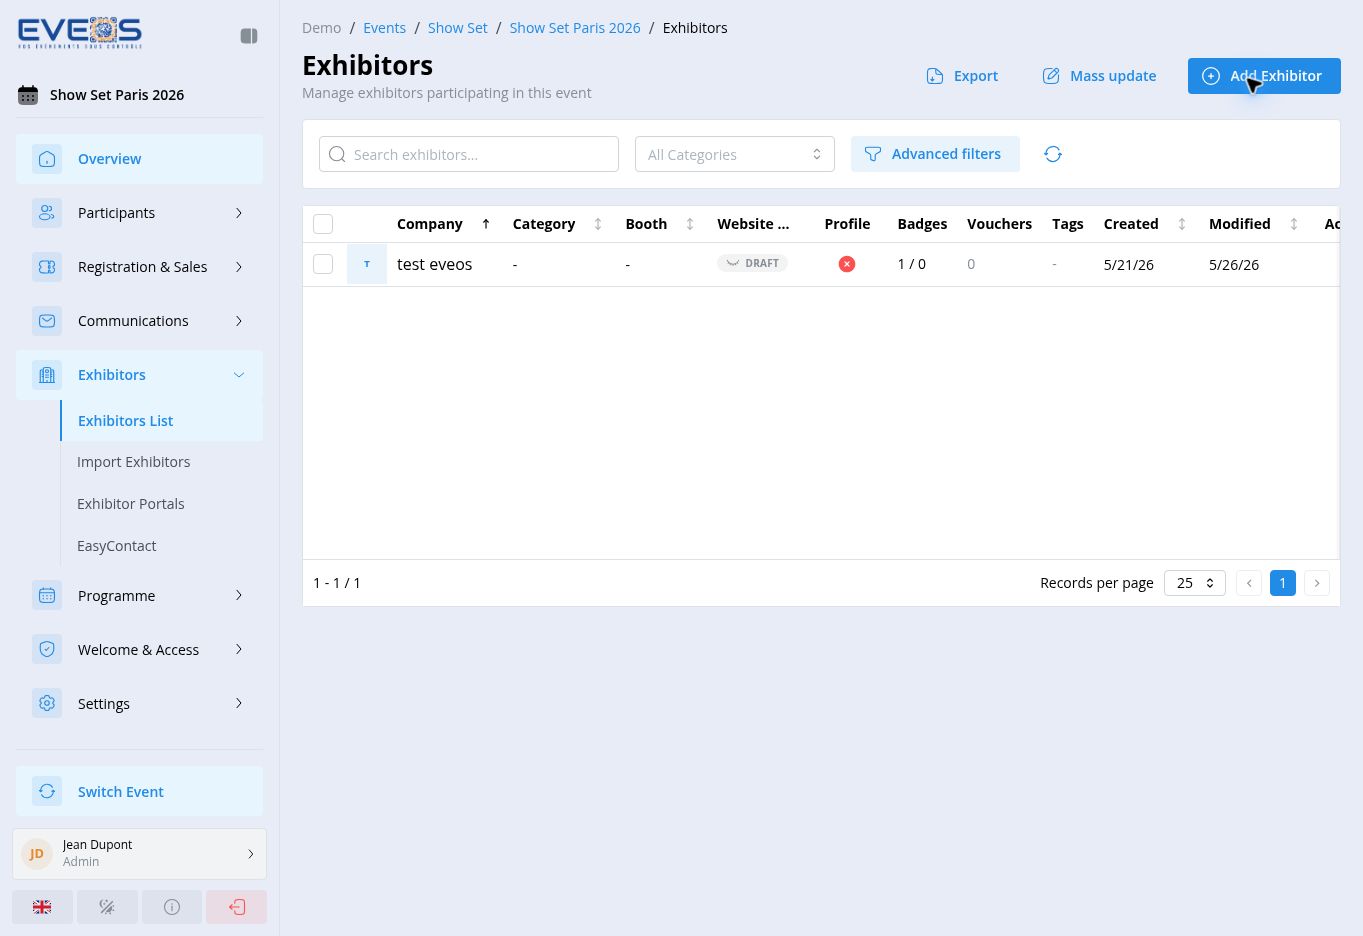
Use “Search exhibitors…”, “All Categories”, or “Advanced filters” to narrow the list, and sort the “Company”, “Category”, “Booth”, “Created”, and “Modified” columns. The actions at the top of the page also let you “Export” the data or run a “Mass update” after selecting records.
Each row’s menu offers, depending on your role’s permissions:
| Action | Use |
|---|---|
| View Portal (per enabled portal) | Opens the portal in a new tab as that exhibitor (see View a portal as an exhibitor). |
| Send email | Sends the portal access email (credentials or direct link) to the exhibitor. |
| Edit | Opens the exhibitor’s full record. |
| Delete | Permanently deletes the record. |
The “Website Visibility” column shows whether the public profile is “Published” or a “Draft”.
Add an exhibitor
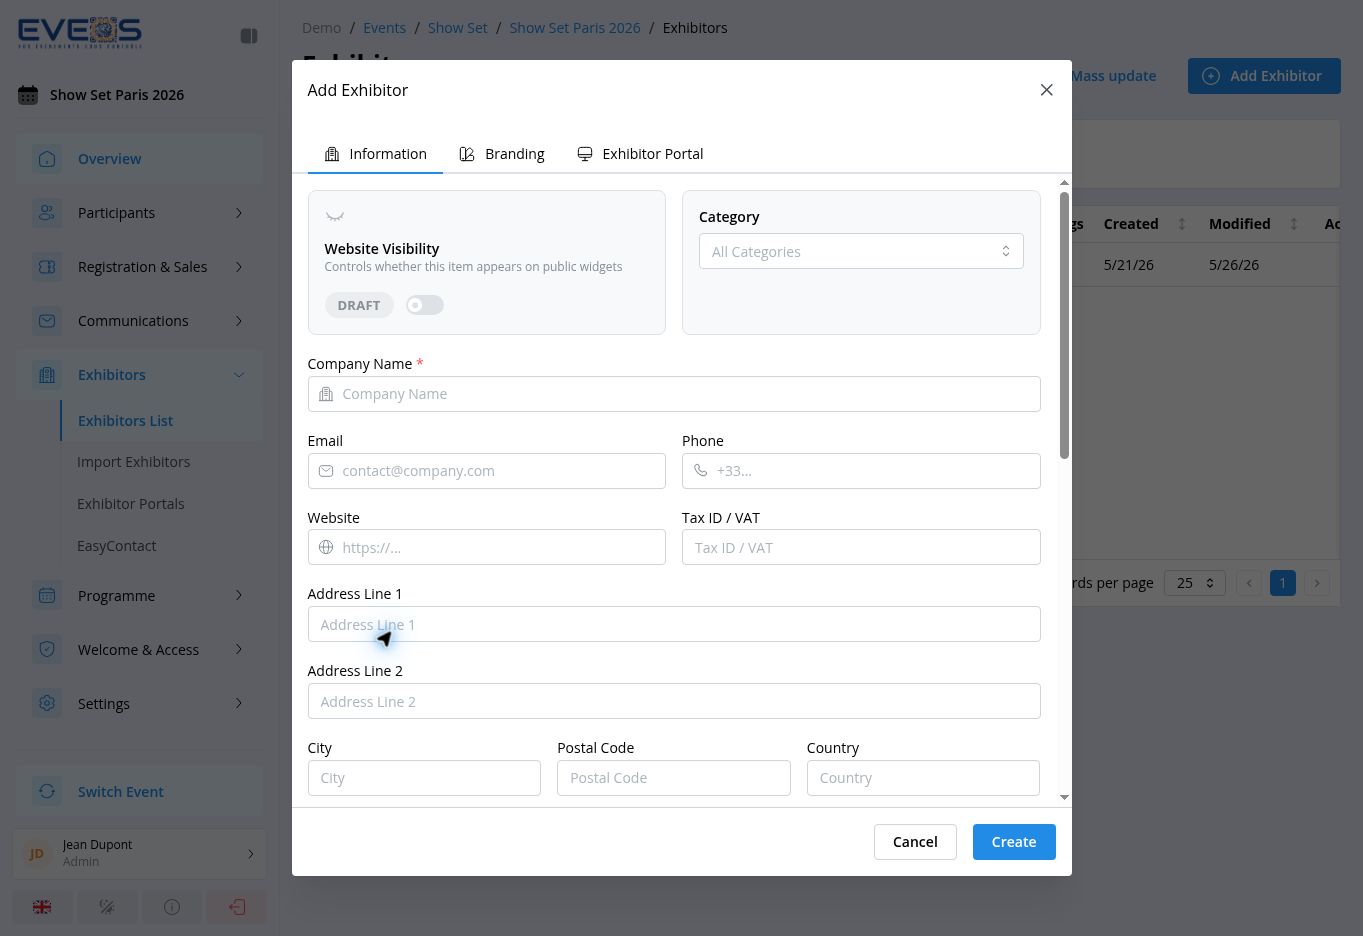
Section titled “Add an exhibitor”- Select “Add Exhibitor”.
- Under “Information”, enter the “Company Name”. Complete the category, contact details, address, and primary contact as needed.
- Keep “Is exhibiting” enabled to enter the booth number, hall, location, and size.
- Under “Branding”, you can add a logo, banner, tagline, description, video, and social media links.
- Under “Exhibitor Portal”, enable “Enable portal access” when the company should use an exhibitor portal.
- Select “Create”.
Exhibitor record tabs
Section titled “Exhibitor record tabs”When editing, the exhibitor record opens with the following tabs:
| Tab | Content |
|---|---|
| Information | Website profile visibility, category, name, contact details, address, primary contact, booth information, tags, internal ID, and metadata (created/modified). |
| Branding | Logo, banner, tagline, rich-text description, video, and social media links (LinkedIn, Twitter, Facebook, Instagram). |
| Portal | Portal access activation and credentials, badge and invitation quotas, direct access link. See Configure portal access. |
| Vouchers | View and manage the promo codes assigned to the exhibitor. |
| EasyContact | Scanning licenses and contacts collected by the exhibitor. |
Only the Vouchers and EasyContact tabs appear when editing; they are not shown when creating a new exhibitor.
Configure portal access
Section titled “Configure portal access”Under the “Portal” tab:
- Enable “Enable Portal Access” to allow the exhibitor to log in.
- Enter the “Portal Login”, “Portal Email”, and “Portal Password”. When editing, leave the password empty to keep the current one.
- Under “Quotas”, set the number of “Badges Allocated” and “Invitations Allocated” for this exhibitor.
- Use the “Direct Access Link” to let the exhibitor access their portal without a password, from a link received by email.
The direct access link relies on a permanent key: select a “Target portal” to generate the complete link, then copy it. “Regenerate key” immediately invalidates the previous key and any link using it; the new key is included in the next email sent to the exhibitor.
View a portal as an exhibitor (impersonation)
Section titled “View a portal as an exhibitor (impersonation)”From a row’s menu, “View Portal” opens the exhibitor portal in a new tab, signed in as that exhibitor. This is useful to check exactly what the exhibitor sees, troubleshoot a reported issue, or complete an action on their behalf.
- It only appears when at least one portal is enabled for the session and your role has the “Impersonate” permission on the Exhibitors module (see Manage roles and permissions).
- If several portals are enabled, the menu lists each one; choose which one to preview.
- The portal displays a permanent yellow banner at the top of the page reading “You are viewing this portal as (company) (admin session)”, with a “Close” button to exit.
- The impersonation session grants full access (read and write) but stays short-lived and does not auto-renew: once it expires, close the tab and restart the action from the backoffice.
- Every impersonation is logged server-side for audit purposes.