
Manage email templates
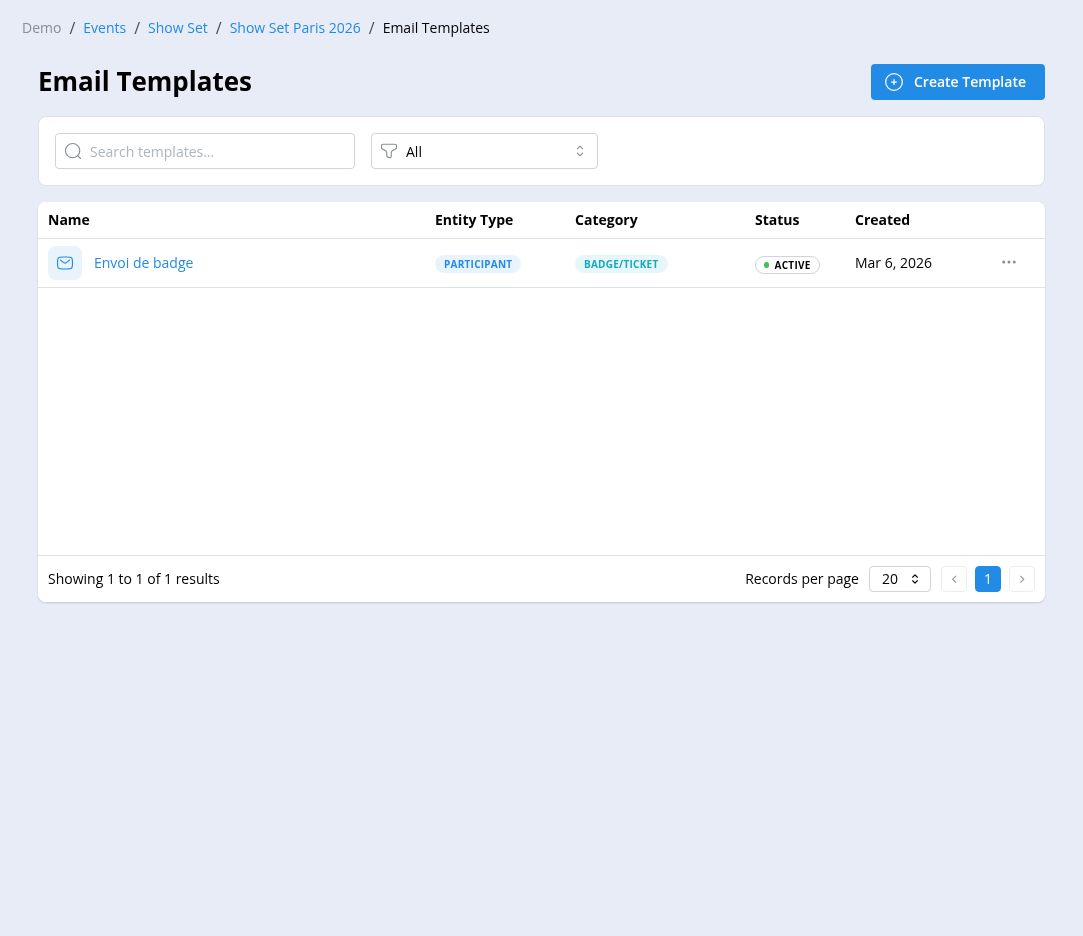
Open “Communications” and select “Templates”. The page provides a template search and an entity-type filter, and displays each template’s name, entity type, category, status, and creation date. Each row’s menu lets you “View”, “Edit”, “Duplicate”, or “Delete” a template.
Create a template
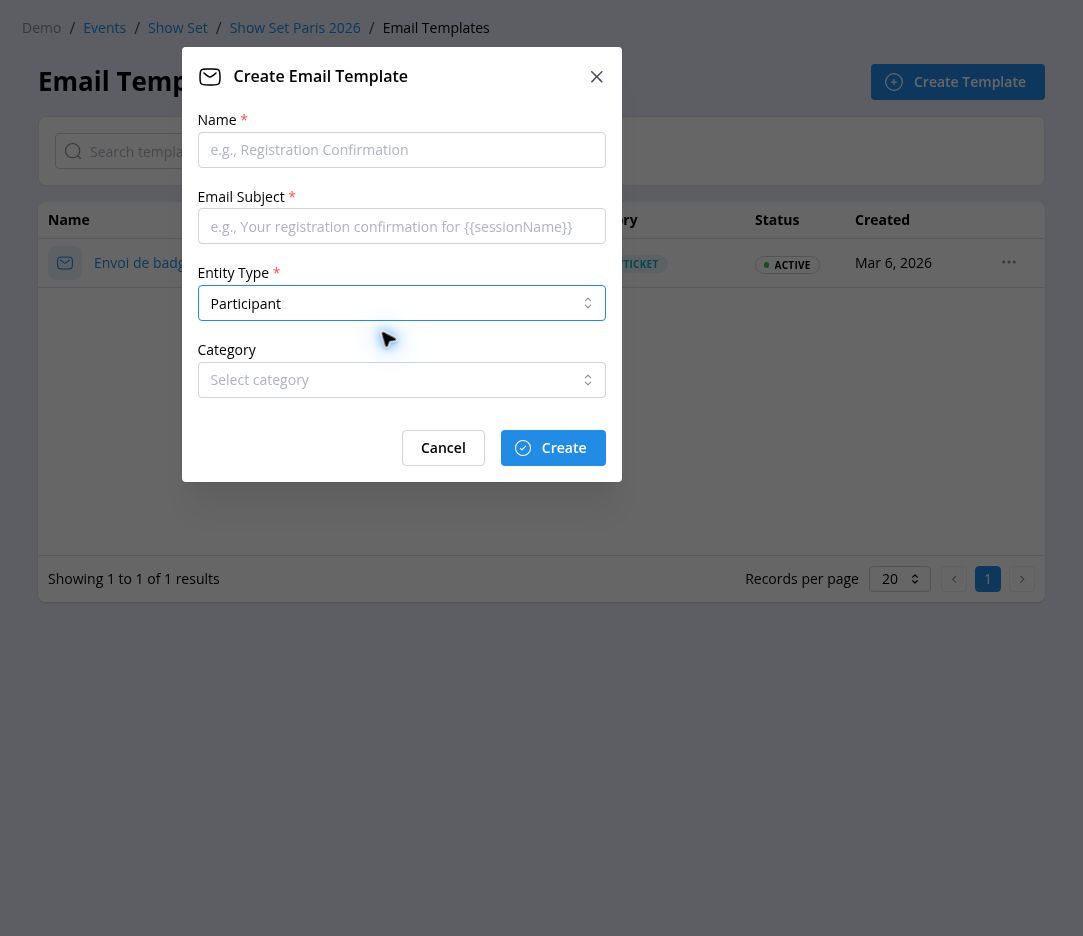
Section titled “Create a template”- Select “Create Template”.
- Enter the “Name” and “Email Subject”.
- Select the “Entity Type”: “Participant” or “Exhibitor”.
- Select a “Category” when needed.
- Select “Create”.
Edit the email content
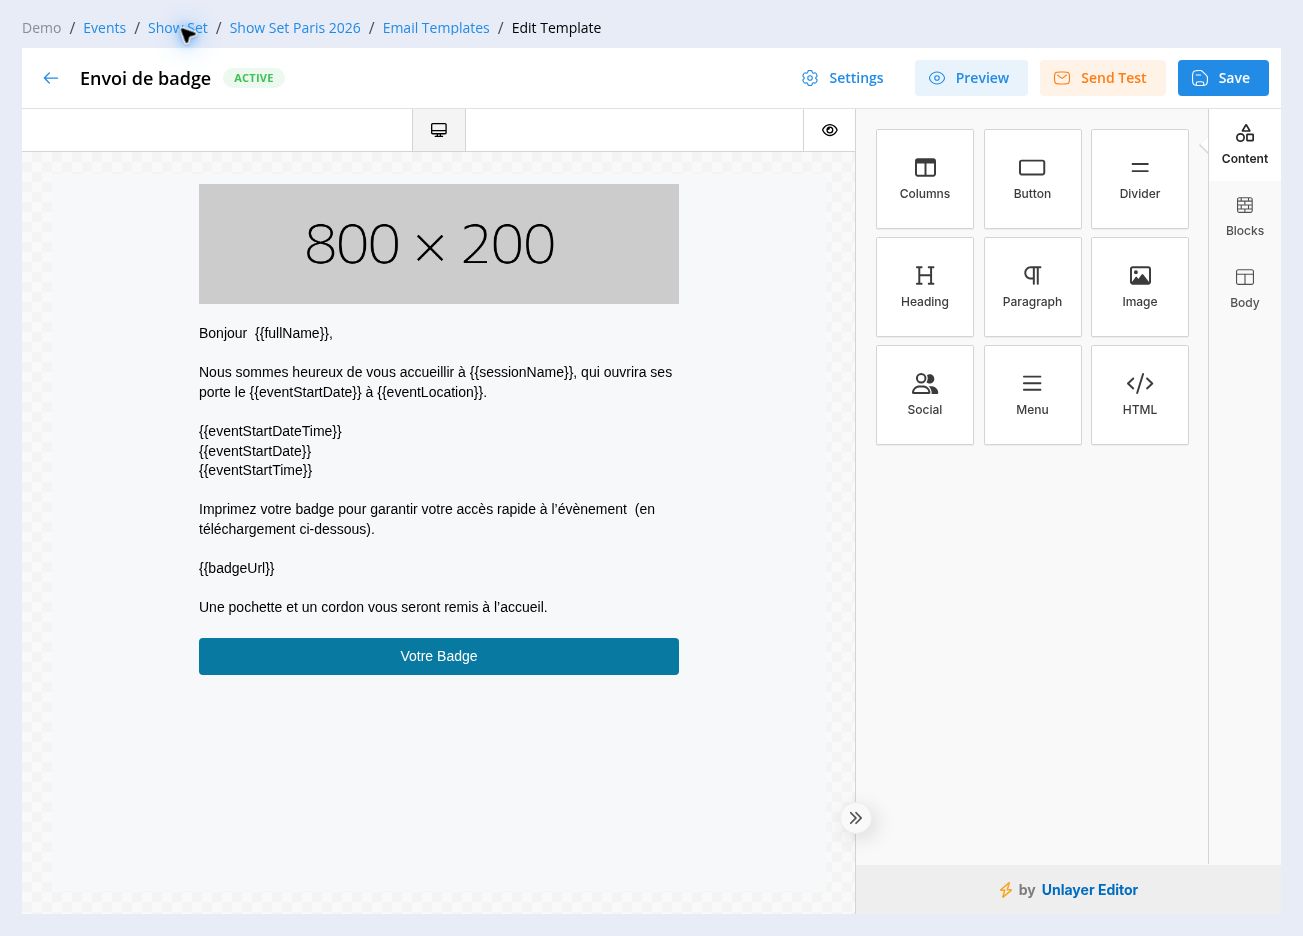
Section titled “Edit the email content”Select a template name to open the editor. Use the content blocks on the right to build the email, then select a block to change its content and appearance.
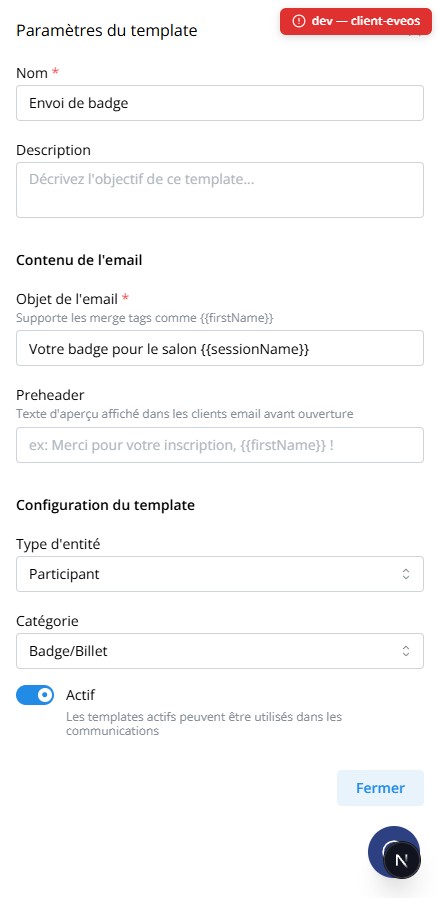
“Settings” opens a panel with the template’s “Name”, “Description”, “Email Subject”, “Preheader” (preview text shown by email clients before opening), “Entity Type”, “Category”, and “Active” status — only active templates can be used in communications.
Personalization variables (“merge tags”, such as {{firstName}} for the
recipient’s first name) are available according to the template’s entity
type. They can be typed directly into the “Email Subject” and
“Preheader” (plain text fields, as {{variableName}}), or inserted into
the content as described below. The content is edited in the dashboard’s
current language.
Insert a merge tag into a text block
Section titled “Insert a merge tag into a text block”- Select a “Text” block in the email, then click inside the text to show the formatting toolbar.
- Select “Merge Tags”, on the right side of the toolbar.
- Browse the available categories (Badge, Custom Fields, Links, Organizer, Participant, Validation, Event) to find the variable you need.
- Select the variable: it’s inserted at the cursor position, as
{{variableName}}. For example, selecting “Email” under the Participant category inserts{{email}}.
Display the session logo or banner
Section titled “Display the session logo or banner”- Add an “Image” block from the “Content” panel.
- Select the image block in the email.
- Under “Image”, enter one of these values in “Image URL”:
{{sessionLogo}}for the session logo;{{sessionBanner}}for the session banner.
- Adjust the width, alignment, and alternate text as needed.
Link a button to the participant badge
Section titled “Link a button to the participant badge”- Add a “Button” block or select an existing button.
- Enter the button label, such as “Your Badge”.
- Under “Action”, keep “Open Website” as the action type.
- Enter
{{badgeUrl}}in “URL”.
Select “Preview” to check the result (the template must be saved first). “Send Test” asks for an email address and sends a test message. Select “Save” to keep the template changes.
Continue with
Section titled “Continue with”- Create and track a campaign
- Configure exhibitor checklists —
{{checklist.<id>.html}}and{{checklist.<id>.progress}}merge tags to insert a checklist into an email.